
Final Project
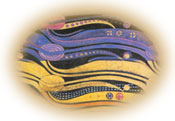
Final Project: Self Portrait

I started this process very tentatively, as I am a worrying, anxious type of person, who would tend to produce a gloomy portrait, so found it hard to get going. In fact, at first I just felt that I couldn’t do it, so started by gathering 2 or 3 items to scan… Having done this, & then ‘selected’ the items, I then played around, transforming, blending etc…
From there the idea came to have the bicycle cogs hurtling through space, with the scarf as a pathway… a peacock feather lends itself to embellishment (& because it is so beautiful with lovely colours & textures it needs little transforming/blending…).
The upshot is a happy affirming fantasy landscape, where I’ve learnt a lot & had fun… you could say that it represents a part of my personality that I don’t manage to tap into enough… so thanks for the opportunity to explore & enjoy what Photoshop has to offer!
Chosen images...
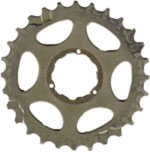

One very positive thing in my life in recent years is cycling. I used to ride years ago, & have a husband who is a keen cyclist & cycle campaigner. But for me it is the only sport that I have managed to stick at & that I can do with a slightly dodgy knee as it’s not weight bearing. I took it up again 3 or 4 years ago after a period of ill-health (melanoma & depression), as a positive affirmation of ‘being well’. I mainly use it as a means of transport to get around various sites that I wisit for work, but do some leisure cycling too. So the 2 cogs are representative of this activity & the pleasure it brings. Having used the magnetic lasso to select the cogs, I then had fun transforming them, & used a filter on the Large cog(at the front). It also has an: Outer Glow: (Blend: ‘Screen’); Inner Glow: (Blend: ‘Soft Light’; Contour: ‘Double Ring’); Bevel & Emboss: (Style: ‘Inner Bevel’) & Contour: ‘Cove Deep’;
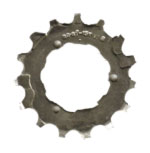
The small cog has been blended as follows: Inner Shadow (Blend: ‘Multiply’); Outer Glow(Blend: ‘Screen’); Inner Glow (Blend: ‘Screen’); Bevel & Emboss: (Style: ‘Inner Bevel’; Technique: ‘Hard Chisel’).
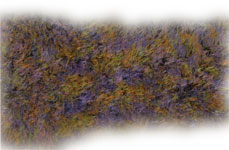
The purple / brown scarf, I was given by an old lady who knitted several for us at work. At the time, I got the last pick & felt I would never wear it… but this year it goes beautifully with a brown jacket I got recently, & with my black coat with purple collar & cuffs, & my lovely purple beret… added to which it’s ideal for cycling as it’s not too long & doesn’t get too hot… so it gives me a lot of pleasure & mixes well with everything, so now I love it… It has the following layer styles: Inner Glow: (Blend: ‘Linear Dodge’; Contour: ‘Gaussian’); Bevel & Emboss: (Blend: ‘Inner Bevel’; Technique: ‘Smooth’; Highlight Mode: ‘Screen’; Shadow Mode: ‘Multiply’). To get the effect of movement I smudged the Inner Glow (I think!) – well whatever I smudged it seemed to work!
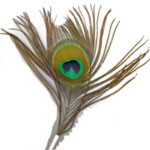
The peacock feather is just one of those beautiful items which speak for themselves, like orchids they stand alone & need little help to be an asset in any composition. However, I’ve had these ones for years & they are a little tatty round the edges & so hard to select. I did discover how to use channels to select the channel with biggest contrast to aid selection, but was then defeated by how to proceed! So I ended up simply selecting the eye of the feather with a feather & then simply duplicated & transformed them to make a stunning display.
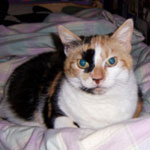
For the trip in outer space, I decided to take my cat, Molly, as she is such a stable feature of our household, having her own distinctive personality & habits! As her selection was rather ragged, I decided that what she needed was to glow, so applied the following styles: Outer Glow: (Blend: Linear Dodge with 50% noise; Technique: 'Precise'); Inner Glow: (No Blends). Molly looks rather solemn in the picture, so I leave it up to your imagination whether she is enjoying the hair-raising trip, hence the static arising from her fur, or conversely, she is scared shitless!
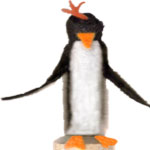
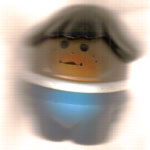
2 toys decided to come for the ride, & they symbolise playfulness… neither of them scanned in well, so much touching up was required, using the following tools: Patch, Clone, Burn & Dodge. The Penguin was transformed (squashed & widened) & a filter applied. I used the following layer styles: Outer Glow: (Blend: ‘Screen’); Inner Glow: (Blend: ‘Lighten’; Contour: ‘Sawtooth’)
The toy child was filtered & then had the following styles / blends applied: Outer Glow: (Blend: ‘Dissolve – 30% opacity’; Technique: ‘Softer’; Contour: ‘Half Rounded’) Inner Glow: (Blend: ‘Lighten’)
Last but not least, comes the OU (Open University) logo. The OU has played a large part in my life in recent years, & it’s where I started out on the path of learning web development skills. I love distance learning, & the opportunities it opens up. The fact that one can do it online these days & network widely with others is an added bonus. So I had to bring a reminder of the OU on my trip too! Having selected the logo which is already slightly opaque, I have added the following layer styles: Drop Shadow: (Blend: ‘Multiply’); Outer Glow: (Blend: ‘Screen’)
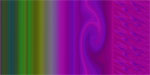
For the text ‘Reach for the Stars!’ I used a noise gradient, that I created earlier in the course which had a variety of filters added to it, together with Horizontal Type Mask Tool, which then has a simple ‘Outer Glow’ style attached to it.
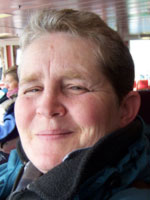
Finally, I chose a picture of myself where I am smiling, a thing I find hard to do in photos, & of course then had to select the lips! These fit rather neatly into the driving seat of the front space craft, & also reflect my pleasure at managing to achieve a project I am pretty happy with! (Always room for improvement I know!).
Deep blue outer space & a few stars added for good measure...
Often I find that I can do things, & do them well, but continue to be dogged by feelings of low self-esteem. I’m glad I’ve managed a project that taps into fun & creativity & hasn’t sunk into dark places.
Photoshop CS2
